Have You ever wondered how this wine is actually made?
Yes, we do know it is made from grapes, but what are the stages involved in the process?
Right from making the wine to understanding different types of wine, everything will be covered in this post.
So, make sure that you read it right until the end, and get hold on the process of wine making.

5 steps Detailed Guide for Wine making for every one, and the history
Wine making
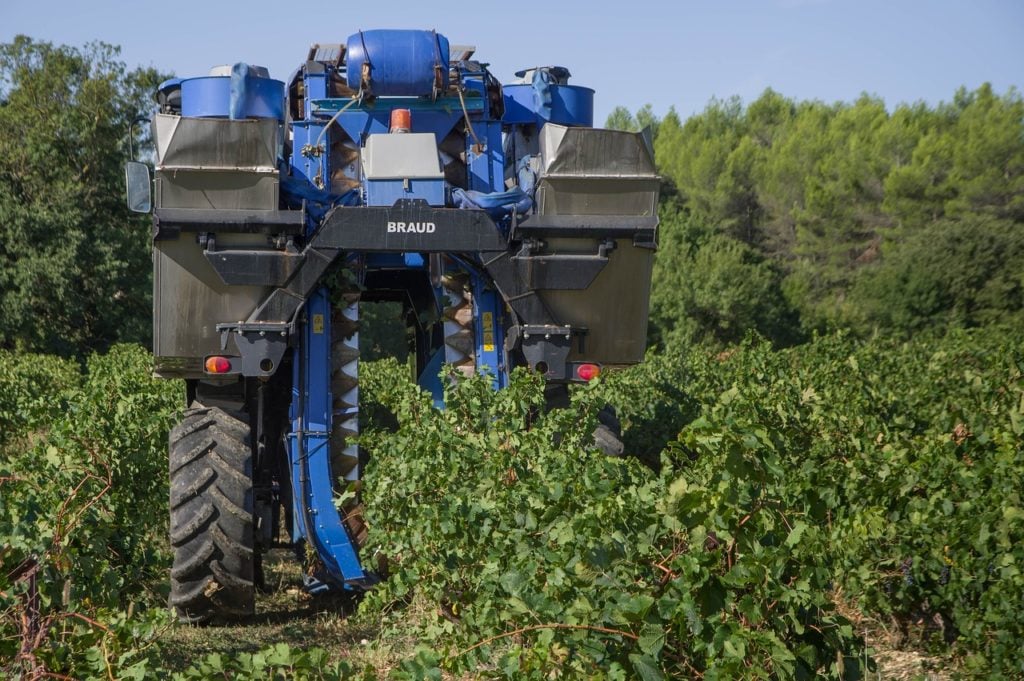
- Step 1 – Harvesting
- Step 2 – Crushing
- Step 3 – Fermentation
- Step 4 – Clarification
- Step 5 – Aging and Bottling
Wine Making
Wine making is something that has been done from thousands of years. Making wine is not just an art but there is also a lot of science involved in the process.
Smallest of mistakes in the process can have a major impact on the final product. Basically, wine is made in 5 different steps.
While these five steps are compulsorily followed by the winemakers, they do add their variations to the process to add an exclusive touch to their wine.
Step 1 – Harvesting
The first step in making wine is harvesting. It is the grapes which contain all the required esters, tannins and acids that make delicious wine.
The moment at which the grapes are picked from the vineyard is what actually determines the sweetness, flavour and acidity of the wine.
The first step in making wine is harvesting.
Along with the traditional tasting method, deciding when to harvest the grapes also requires a fair bit of science.
It is very important to make sure that the sweetness and acidity of the grapes are in perfect balance while picking the grapes. And not to forget, weather also plays an important role in the harvesting process.
Harvesting can be done by hand or by machines. However, many of the winemakers prefer to do it by hand as machines are known to negatively affect the grapes and the vineyard.
Once grapes are picked, they are taken to winery and are then sorted in bunches. Under ripe and rotten grapes are removed.
Step 2 – Crushing
Once the grapes are sorted in bunches, now it is time to de-stem them and crush them. This crushing process used to be done by feet in the past.
If you have ever gone on a wine tour, many of the wineries do allow you to crush them by feet as part of the tour.

The crushing process used to be done by feet in the past.
However, majority of the winemakers now do this crushing process mechanically. There are mechanical presses available which trod or stomp the grapes into ‘must’.
Must is nothing but fresh grape juice which is the outcome of the crushing process and contains seeds, solids and skins of the grapes.
While winemakers prefer staying away from machines in the harvesting process as it affects the grapes negatively, in the crushing process, machines have made the process more sanitary and has also helped in increasing the quality and longevity of the grapes.
If white wine is being made then the seeds, solids and skins are quickly separated from the grape juice to prevent the tannins and color fro leaching in the wine.
On the other hand, if red wine is being made, the seeds, solids and skins are allowed to stay in contact with the juice to allow the juice to get additional tannins, flavour and colour.
Step 3 – Fermentation
Crushing and pressing is followed by the fermentation process. Must naturally starts fermenting within 6 to 12 hours when wild yeast is added to it.
But many of winemakers add cultured yeast to the must to predict the final outcome and ensure consistency.

Fermentation transform the sugar into alcohol!
This fermentation process continues until all the sugar is transformed into alcohol, resulting in the production of dry wine.
If sweet wine is to be made, winemakers halt the process in between to prevent entire sugar from converting.
The total fermentation process can take about a week to a month and even more.
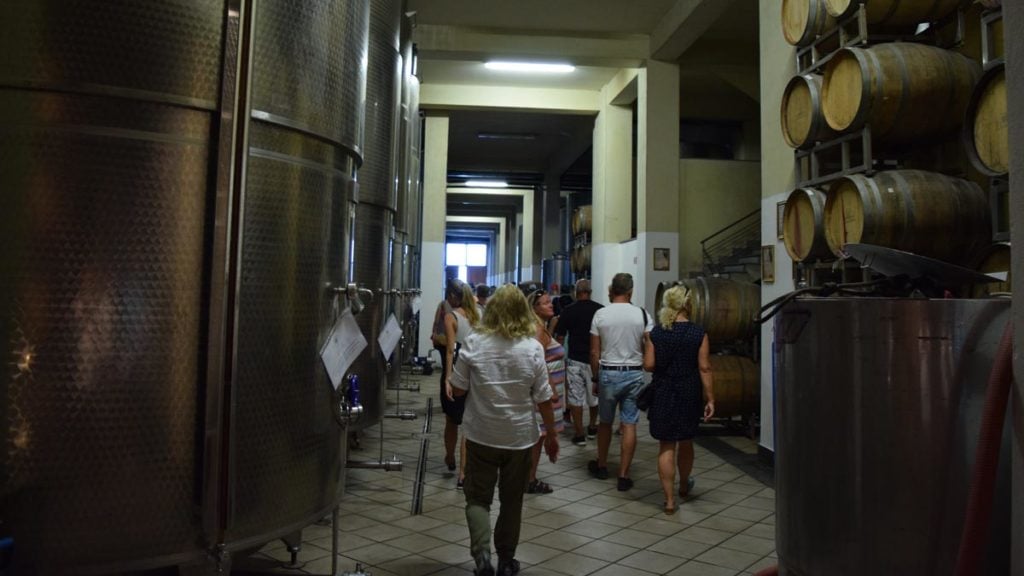
Step 4 – Clarification
After fermentation, it’s time for clarification now. This is the process in which tannins, proteins and dead yeast is removed from the wine.
For this, the wine is transferred into stainless steel tanks or oak barrels.
Filters are used to catch the larger particles.
Filtration or fining process is used for clarification. For clarifying, substances are also added to result in the fining process.
For instance, some winemakers add clay to the wine to which the unwanted particles will stick to and will take them to the bottom of the storage tank or barrel.
In the filtration process, filters are used to catch the larger particles.
After the clarification process, the wine is transferred into other tank and prepared for aging or bottling.
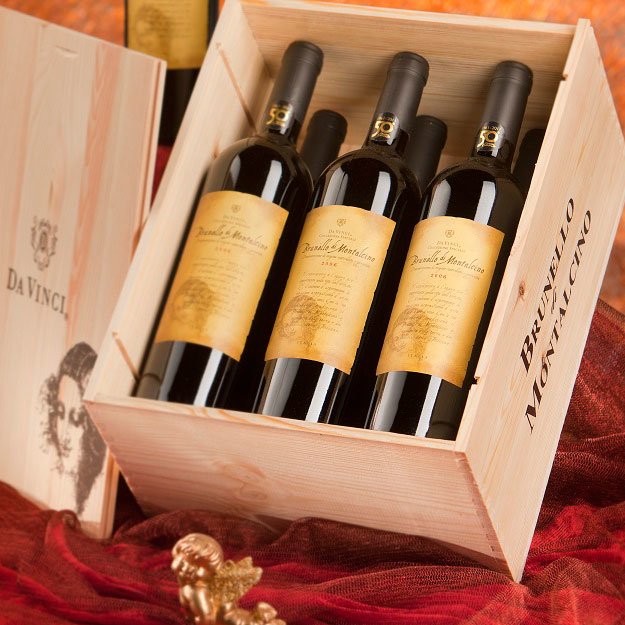
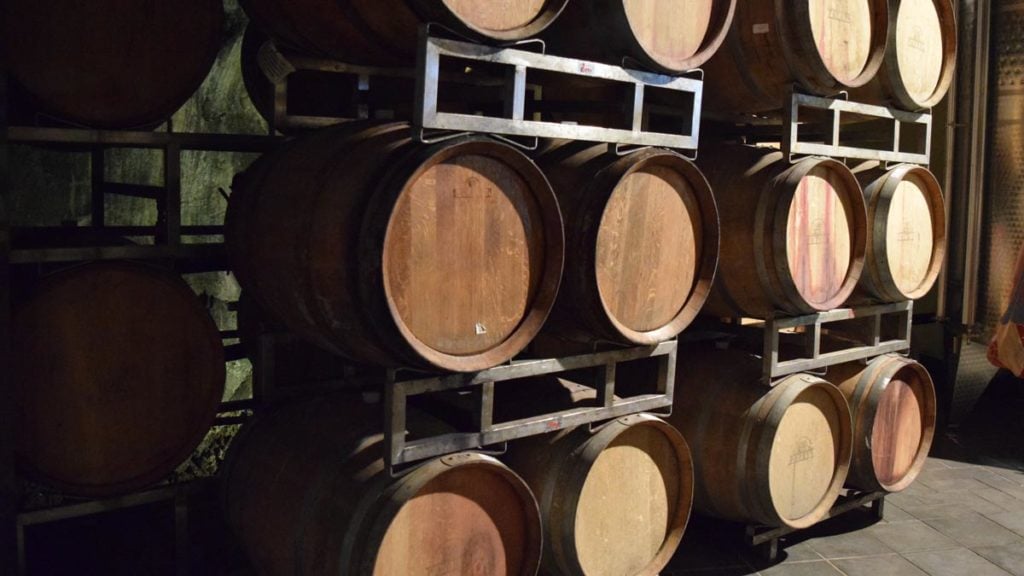
Step 5 – Aging and Bottling
The final stage of this process is aging and bottling the wine. The wine can be instantly bottled or the winemaker can give additional aging to the wine.
For aging, the wine is transferred to oak barrels, stainless steel tanks or bottles.
For aging, the wine is transferred to oak barrels, stainless steel tanks or bottles.
Many of the winemakers prefer using oak barrels for aging as it is known to add a rounder, smoother and more vanilla-like flavour to the wine.
Moreover, it also helps in increasing their oxygen exposure, allowing the tannins to get reduced and enabling the wine to reach to an optimal flavour.
For white wines, steel tanks are generally preferred.
Once the aging process finishes, the wine is then bottled with screw cap or cork.
These are the five steps that make up the winemaking process. As mentioned above, winemakers do add their variations to the process to add their exclusive flavour to the wine.
How to make wine at home
Not good, but better!
Furthermore, you’ll have the satisfaction of knowing that your do-it-yourself wine is actually natural and vivacious! Not laced with commercial sorbates, sulphur dioxide, or glycerol.
Commercial wineries are forced to hasten their products with filters, chemicals and pasteurization.
To businesses, time is money and we know the saying – really good wine can only get better with time.
Unlike commercial wineries, the one advantage you have is plenty of time.
This is what gives you that extra edge to make better wine than you can buy out there.
Here we will go through the wine making process, step by step, when you want to DIY (do-it-yourself)
Book: Making Your Own Wine at Home
Everything You Need to Know Explained Simply (Back to Basics)
Equipment for Making Wine at Home
If you intend to be a badass vintner, here are the items you’ll need to make it all happen at home:
- An open container of at least eight gallons capacity
- Two-gallon stainless steel or enamelled bowl or pot
- A two-quart, small-mesh sack
- Nine one-gallon, small-mouth jugs
- 1 ½ gallon, small-mouth jug
- 6 feet of flexible, clear plastic tubing
- 25 screw top wine bottles with plastic caps
- A roll of plastic food wrap
- Some rubber bands
- A reliable hydrometer
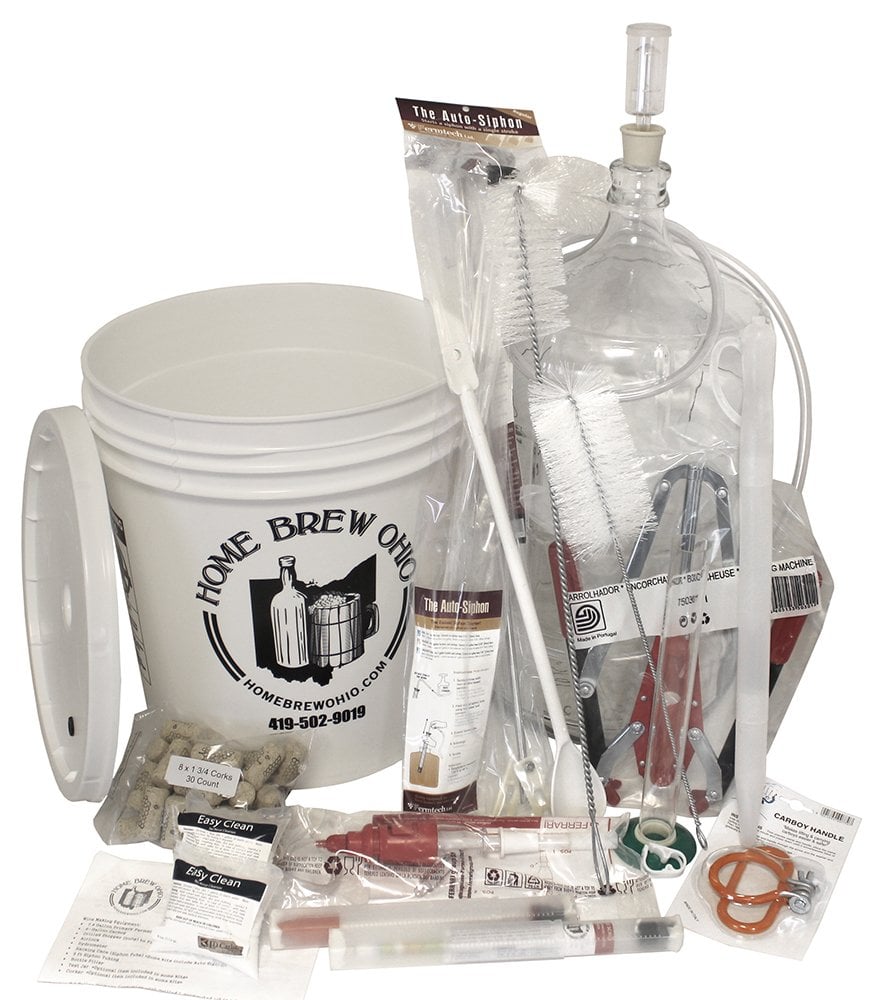
All-in-one DYI Wine Making kit
This excellent winemaking Kit includes winemaking equipment is one of the most complete equipment kits you will find
Ingredients for Making Homemade Blackberry Wine
Blackberry wine tastes amazing and is easy to make. Here’s what you need:
- 15 pounds of blackberries
- ½ cup of raisins
- ½ teaspoon of ascorbic acid (preferably vitamin C) – the powder is better
- 5 gallons of water
- 1 tablespoon of an acid blend (or the juice of one lemon)
- 10 pounds of sugar
- 1 package of dry wine yeast
- Hydrometer
Blackberry for wine making
Vinter’s Harvest Fruit Base Blackberry, 96 oz, Recipes Included
Wine preparation – let’s Begin
- If your fruit has been sprayed, wash it. Besides, even if you do everything well, nobody wants to drink contaminated wine.
- Crush the berries to release the juice. You can do this by filling a two-gallon flat-bottomed bowl or stainless steel pot until it’s half full of berries, and mash them firmly using your knuckles.
- After mushing them up, empty into a nylon sack as you hold the bag over the 8-gallon plastic can.
Squeeze the sack gently against the side of the can to force out the free juice from the pulp.
Then fill the two-gallon bowl halfway with berries again, mash them and add the new pulp to the mass that’s in the sack.
Do this again until all the fruit has been crushed and all the pulp is in the bag.
Throw in the raisins, tie the top of the sack and ensure it’s closed.
Then leave it in the can with the fruit juice. - Add the ascorbic acid so as to prevent the wine from oxidizing and changing colour when it’s exposed to air and light.
- Heat 5 gallons of water just before it reaches boiling point and add it into the fruit juice in the 8-gallon can.
The hot water kills wild yeast and bacteria in the juice and pulp. This prevents competition with the wine yeast that you’ll soon add to the must. - Empty the acid blend which is a triple mixture of tartaric from grapes, citric from citrus fruits, and malic from apples.
- Pour in about 2/3 of the 10-pound bag of sugar and vigorously stir the solution in the main fermentation vat to dissolve the sweetener.
Then cover the can with a towel, and let it cool to room temperature for about ten hours or so. - When the must has attained room temperature, check its specific gravity using the hydrometer.
Add a little sugar at a time, stir the must until the sweetener has dissolved and tested the solution’s specific gravity.
When the bulb in the hydrometer floats at the 1.095 mark. This level produces wine that is about 14% alcoholic. - Sprinkle a generous amount of the dry yeast onto the must and DO NOT STIR.
Some yeast will sink directly to the bottom of the can and most will float.
Primary Fermentation
- Within 12 hours, you’ll see signs of fermentation. Small bubbles will form a circle of foam a few inches in from your vat. This foam will surround any floating yeast and leave a smell in the air.
- Stir the must twice a day using only a wooden item. Punch down the bag of pulp and always re-cover the fermenting must with a towel to keep dust and flies away.
- Check the specific gravity of the fermenting brew at least once a day and keep a record of the developing wine’s specific gravity.
As the yeast eats the sugar, it will produce carbon dioxide and alcohol. - Carbon dioxide produces bubbles as it forms but the alcohol remains in the must. As the quantity of sugar decreases, alcohol increases and the specific gravity of the must drops.
When the specific gravity drops to 1.030, it’s time to transfer the wine into closed bottles for secondary fermentation.
Secondary Fermentation
- Without using soap, wash eight of the nine one-gallon jugs super-clean by rinsing the container several times with cold water.
- Squeeze the bag in the primary fermenter until the sack is completely dry. Throw away the pulp, rinse the bag in clean water and hang it where it will dry until next use.
- Stir the must and sediment together in the main vat and using a cup or bowl, fill the gallon jugs with the mixture up to the “shoulders”.
- After sealing the secondary fermentation jugs, rinse out the original plastic can with plenty of clean water.
Wine Bottles
Clear or Green, with corks
Storing the Wine
After you separate your wine and yeast by-product, it won’t taste very good. You’ll have to let it age to acquire the taste that suits you. It could be between 2 weeks to six months.
Always remember that the more white sugar you add to your juice, the longer it takes to get the taste.
You don’t require a specialised room to store the wine. A cool, dark place will help the wine to age without external factors such as heat and light, influencing it.
On the other hand, if you really want to store the wine as a pro, you have to read more about storing fine wine.
Go Pro, buy a Wine Cooler
Small or large – all you need
FAQ – Often Asked Questions about Wine Making
How long does wine take to make?
It takes from 2 to 8 weeks to make wine. First 10 to 15 days for the fermentation, and then filtering and clearing in 1 to 6 weeks.
After that, You could drink the wine, but You would often want to store it for at least 1 month for aging, and up to several years, before the taste is like you want it. But it will drinkable in just about 2-8 weeks

A great article indeed and a very detailed, realistic and superb analysis, of this issue, very nice write up, Thanks
Thanks for your article very nice post ….